Rooting an Android emulator

I recently had to verify that a piece of security software correctly identified an android device as rooted. This of course raises the question, “how do you configure a device to be “rooted”?” The instructions and software vary by device, but if you’re just trying to confirm the detection of a device’s rooted status, the easiest method is to root an Android Studio emulator. This is because there are no manufacturer-specific safeguards to prevent you from rooting the emulator and you don’t have to worry about irrevocably corrupting actual hardware during the rooting process. So without further preamble, the instructions!
In order to root your emulator, you’ll need to download the following softare:
You will also need to install ADB, which can be done in Android Studio directly by following the steps below:
- Open Android Studio
- Click on “Tools” on the top bar
- Select SDK Manager
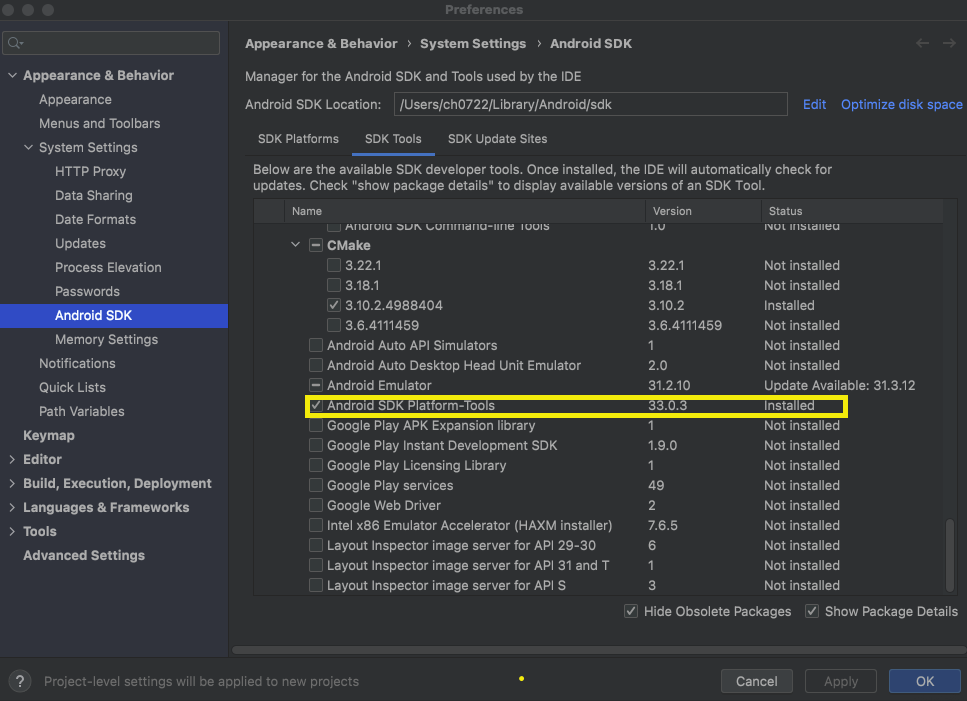
- In the Center Box, select the “SDK Tools” tab
- Scroll down to “Android SDK Platform-Tools”
- If already installed, skip to next step
- If no checkmark / not already installed, checkmark the box and hit “apply”.
- Complete the process to install SDK Platform-Tools
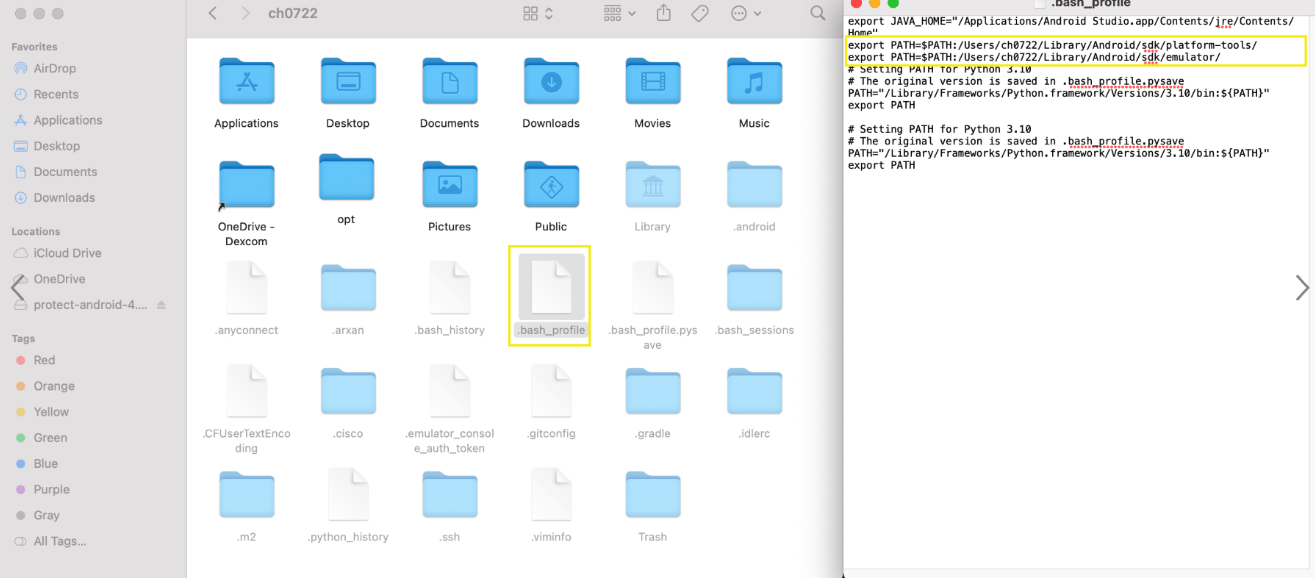
Next, you’ll need to add “emulator” and “adb to your PATH variable:
- Open a Finder window
- Press Command + Shift + G then press Enter to be navigated to the root folder of your mac
- Open “Users” directory
- Open your User directory (example: ab1234)
- Press Command + Shift + Period (“.”) to show hidden files
- Open .zshrc in a text editor (double click)
- Copy/paste the following lines to this file:
- export PATH=$PATH:/Users/
/Library/Android/sdk/platform-tools/ /*adds adb to path*/ - export PATH=$PATH:/Users/
/Library/Android/sdk/emulator/ /*adds emulator CLI to path*/
For the remainder of this tutorial, you will want to open 3 Terminal instances which will be used for the following:
A: Emulator B: Assorted Commands to verify the next step(s) are ready C. rootAVD
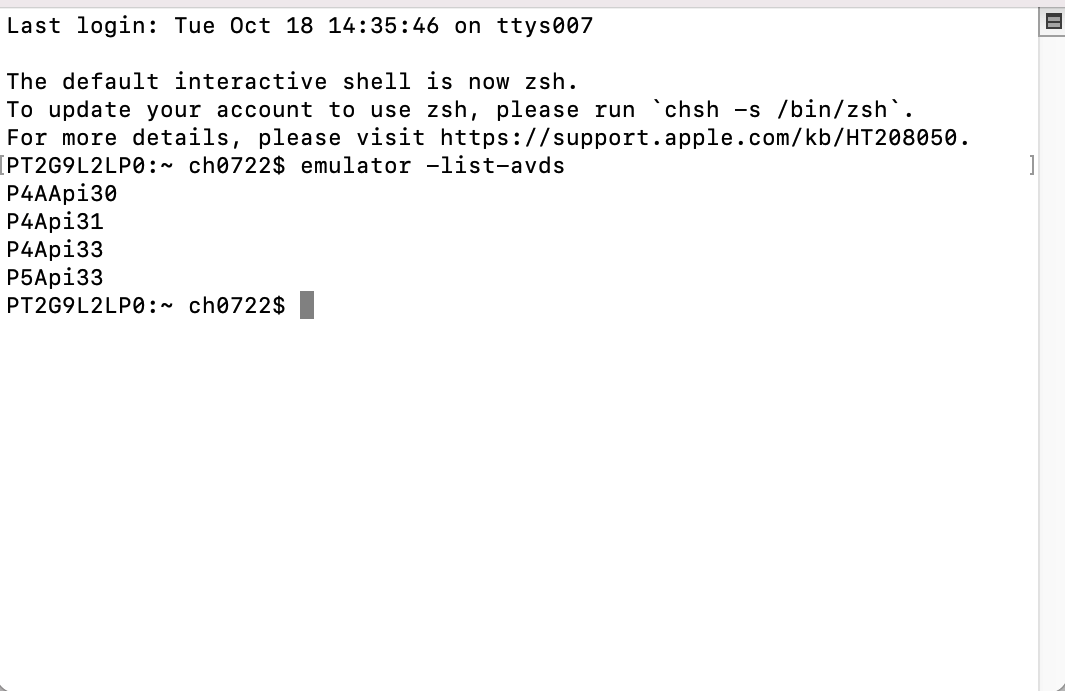
If you haven’t already, download Magisk and rootAVD as seen above. Unzip the rootAVD .zip file. Relocate the folder to a more permanent location if desired. From Terminal A or B, run the command “emulator -list-avds”. You should see the names of all the emulators you’ve created in Android Studio:
From Terminal A, run the command “emulator -avd
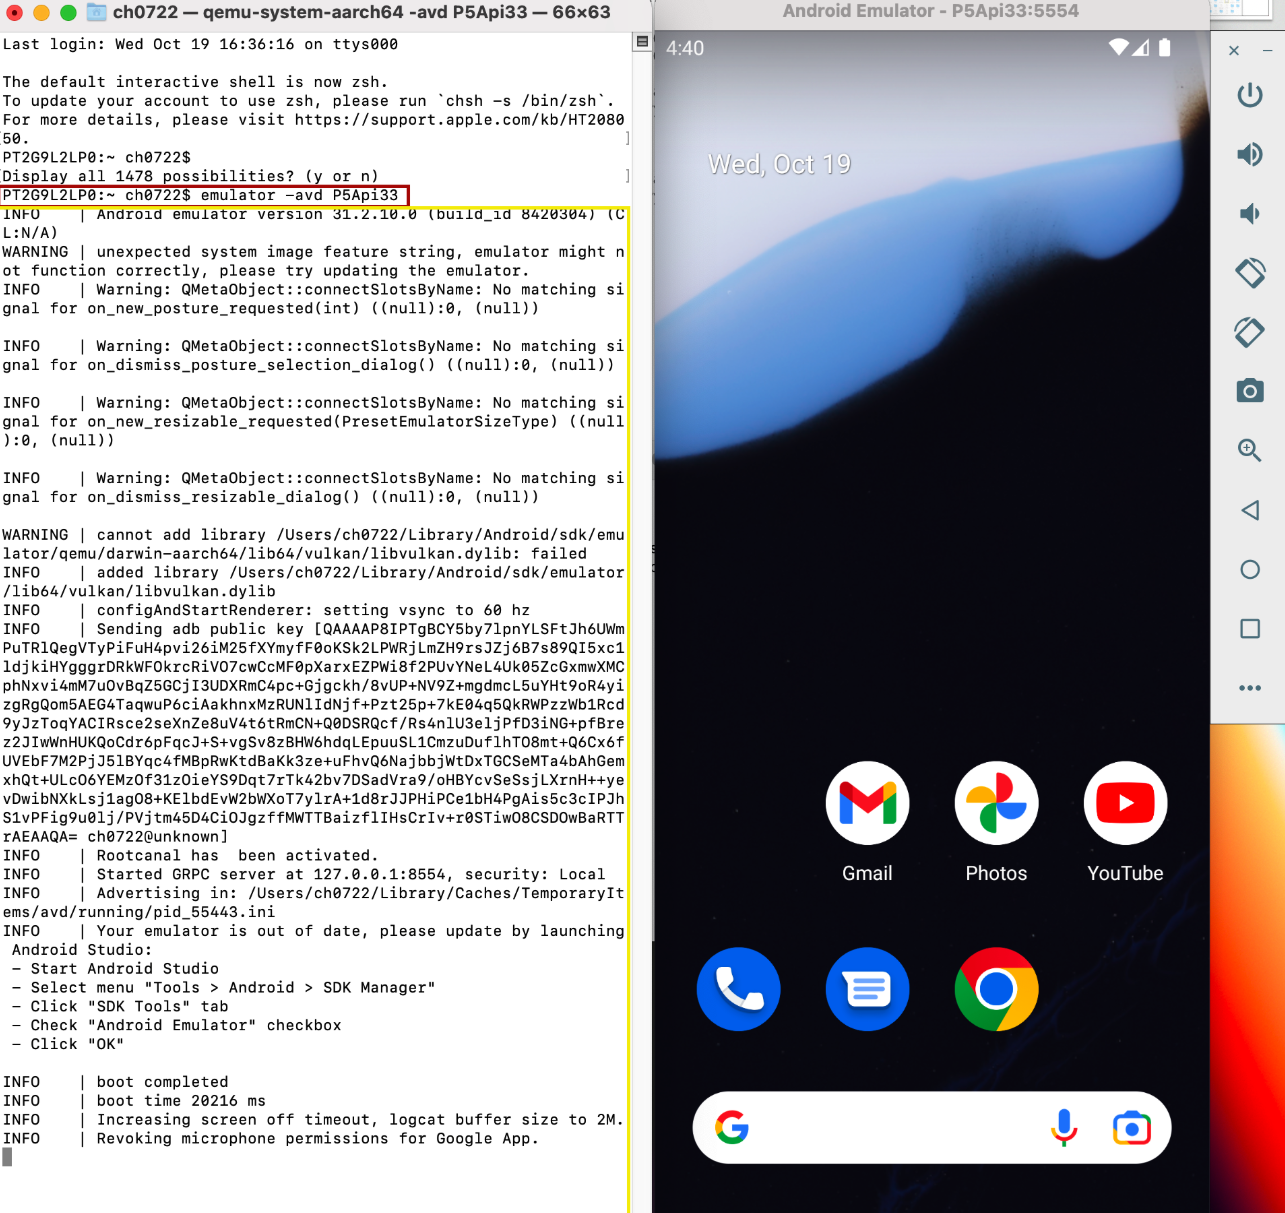
After the Emulator has started, drag-and-drop the Magisk apk from your download folder to the emulator. Open Magisk from your apps list and tap “install” on the App tab (NOT the Magisk tab)
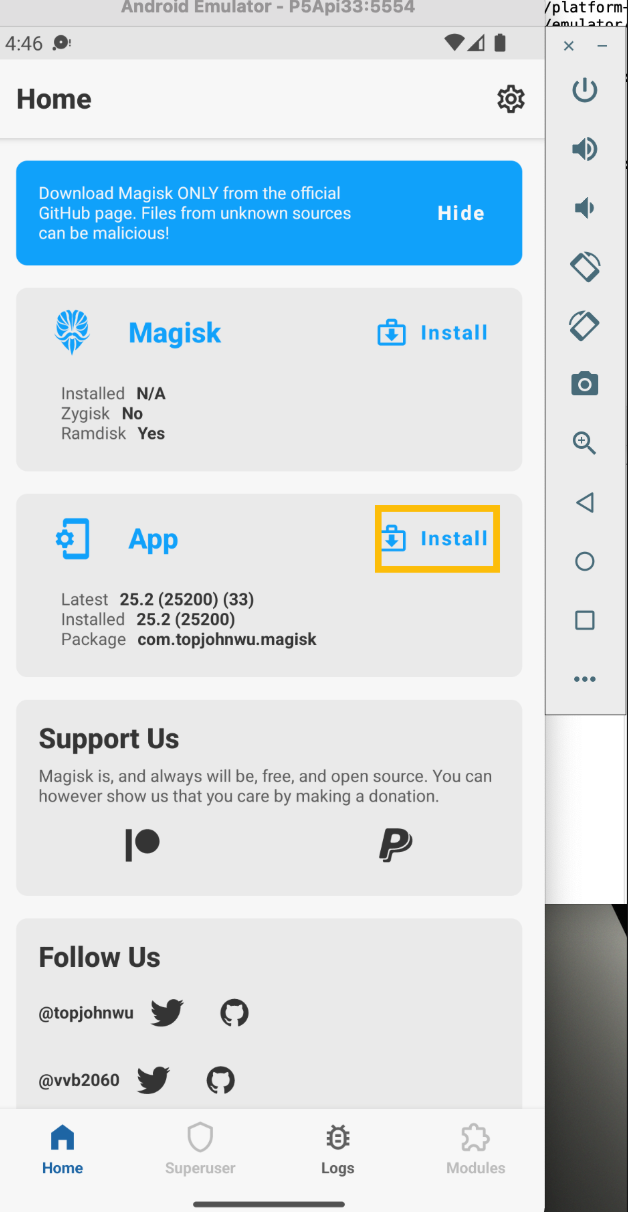
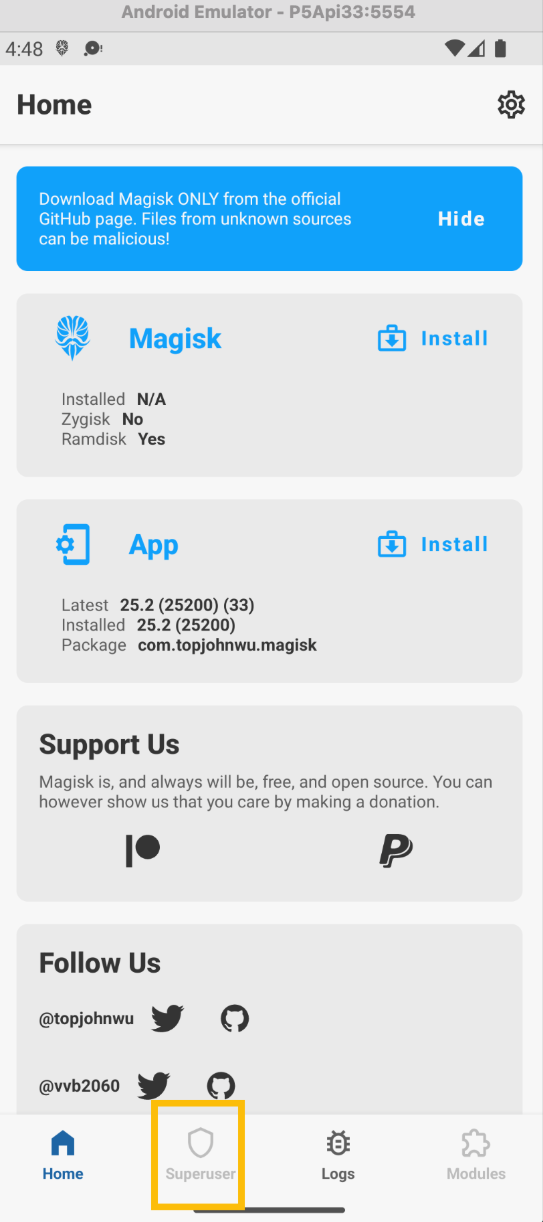
You may be prompted to authorize unknown sources in order to install. Click yes. Swipe back. You may be prompted to install an update. Confirm that you are not root by looking at the bottom of the Magisk screen. There should be a “Superuser” button that is greyed out, indicating you do not have root access.
In Terminal B, confirm that adb is in Path and can connect to your running emulator with the command “adb devices”. A “List of devices attached” should be displayed, with only one result of “emulator-XXXX”, where XXXX is a 4-digit port code. Ex: “emulator-5554”

In Terminal C, navigate to the folder where you saved the contents of rootAVD.zip. Still in Terminal C, confirm that rootAVD runs and detects your emulators by executing “./rootAVD.sh ListAllAVDs”. You should see a list of lines describing your emulators and the commands you would run to root them (which you can copy/paste).
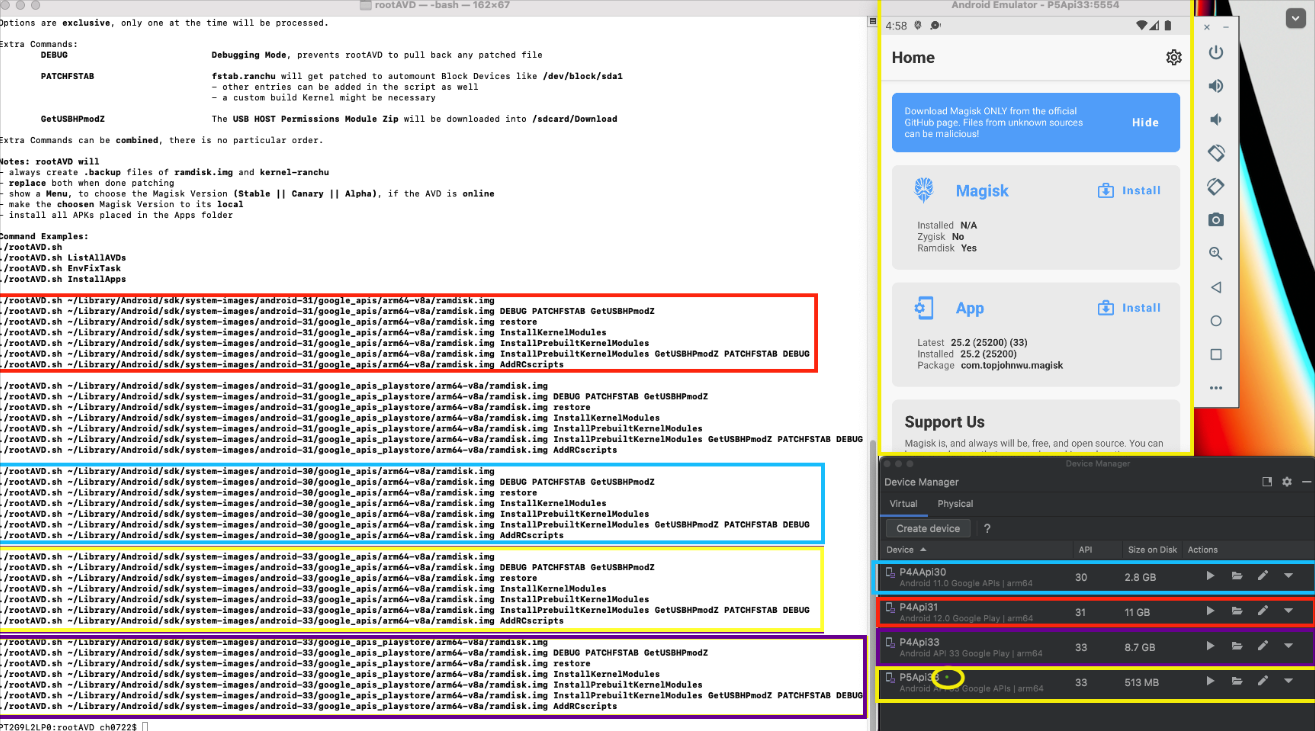
Example: ./rootAVD.sh ~/Library/Android/sdk/system-images/android-33/google_apis/arm64-v8a/ramdisk.img
Refers to an emulator with the following configuration:
- android-33: The API / SDK version installed on this emulator
- google_apis_playstore / google_apis: Source used to install your API / SDK. Useful for helping you differentiate one emulator from another.
- arm64-v8a: The type of processor this emulator uses, which can help you match rootADV devices to Android Studio devices. Pixels use arm64.
To summarize the example above, a Pixel 5 emulator is running API 33 downloaded from Google APIs.
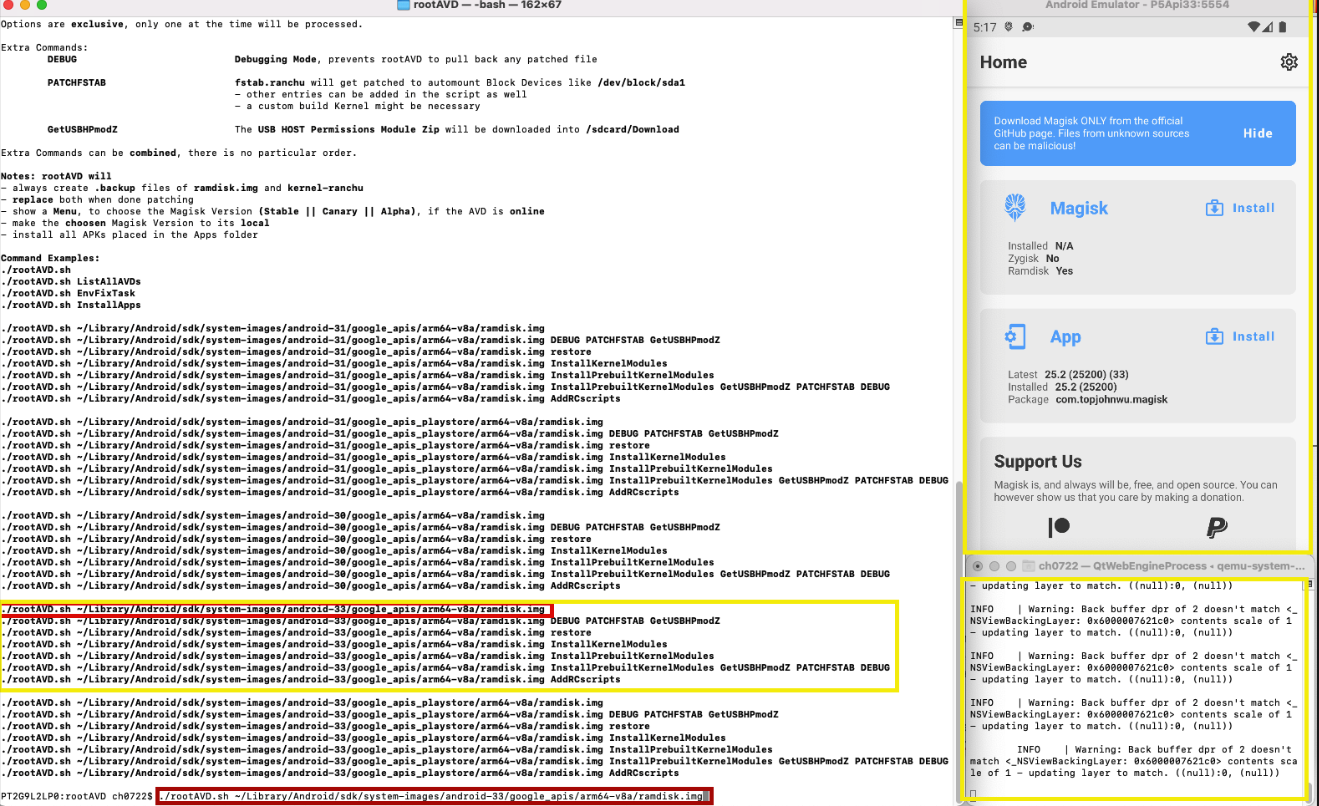
Find the corresponding candidate command for the (now currently running in Terminal A) emulator you wish to root (In yellow, previous screenshot). Using the emulator from the example above, you would execute:
./rootAVD.sh ~/Library/Android/sdk/system-images/android-33/google_apis/arm64-v8a/ramdisk.img
Copy/Paste the command above, edit it for the emulator of your choice, and then hit enter.
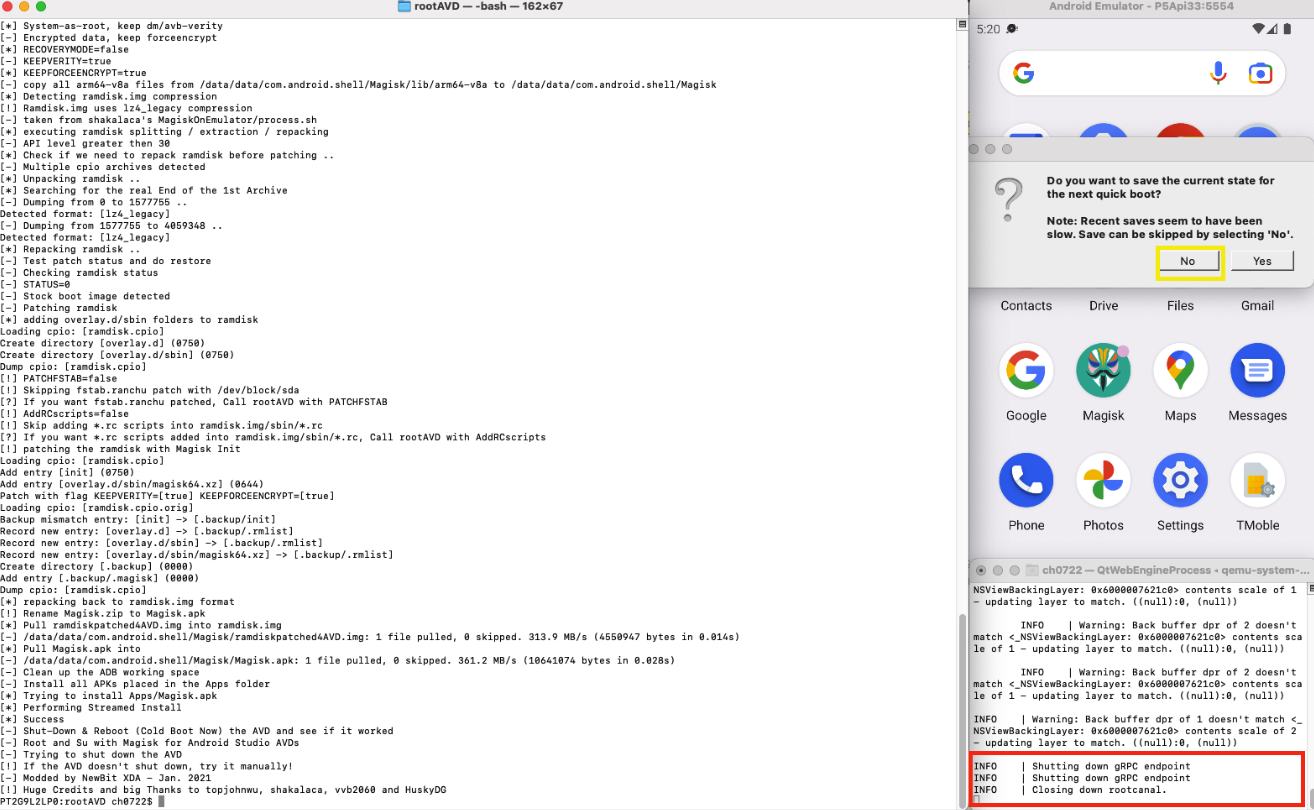
The emulator should shut down. It may first pop-up a window asking if you wish to save state for next boot. Select No.
Open the Terminal where the emulator was running. Restart the emulator by running the previous command (simply press “up” then “enter” on the keyboard)
- If the device successfully restarts, fantastic!
- If the device black-screens, wait a minute. It sometimes take a bit before it boots. Another possibility is that the emulator is active but the device is “off”. Press the power button at the top of the emulator’s right-side menu.
Once the device has restarted, open Magisk. If the “Superuser” tab is no longer greyed out, you have successfully rooted your device!
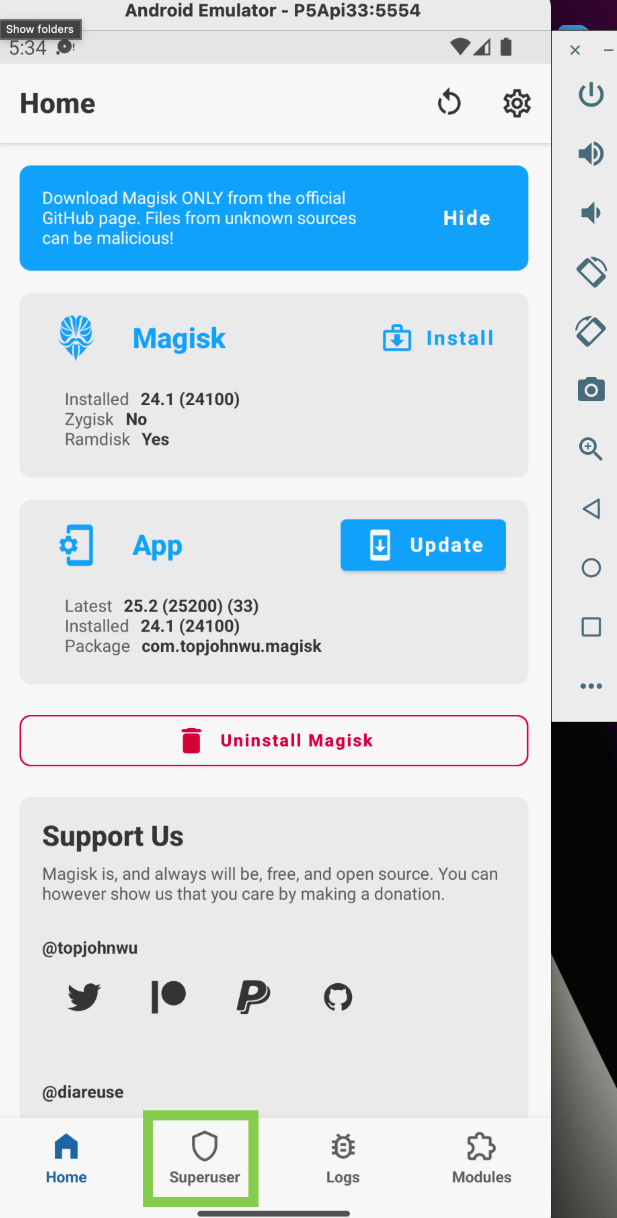
Photo by DeeDee Wang on Unsplash
Comments