Passkey Support

I recently had to integrate Google’s passkey APIs into an Android app that I support, so I figured I’d write up a brief summary of my findings. This article is not intended to replace the official documentation and Google passkey course. Instead, it’s supplemental reading covering my own lessons learned during the implementation.
First, why use passkeys? Passkeys are considered better than traditional MFA (Multi-Factor Authentication) because they eliminate the need for passwords altogether, making them significantly more resistant to phishing attacks and data breaches. They also provide a high level of security by leveraging device-based cryptographic keys and biometric authentication. This gives passkeys the benefits of MFA with a single, seamless step all without the extra login friction involved in traditional MFA methods. For example, entering username & password, then receiving and inputing a code from an SMS message, then answering a security question, and so on. Passkey authentication basically achieves MFA in a single step.
Passkeys are created on a device-by-device basis. They use public key cryptography and Public Key Infrastructure (PKI). The public certificate is stored with applications that you need for authentication, while the private key is stored by Google Password Manager. On Android OS 14 and above the specific API is called Google Credential Manager and it supports 3rd party managers like 1Password, Okta and Apple Keychain. This has the added benefit that it protects applications from data breaches because there is no password database that can be cracked in the event of a breach of the applications’ backend servers.
In order to integrate a website with an app you need to update the assetLinks.json file on your website based on the json for your app. This can be done in the Google Play Console under Test And Release > Setup > App Signing. Once the assetLinks.json is updated you also need to register the website domain in your application’s AndroidManifest.xml file.
When you try to register a passkey using the Google CredentialManager APIs you need to make sure your backend responds with the appropriate challenge/response JSON listed in the documentation. The credential manager then saves the private key and uploads the public key to the server, which your backend team (or you, if you’re a full-stack developer) configures to persist that key.
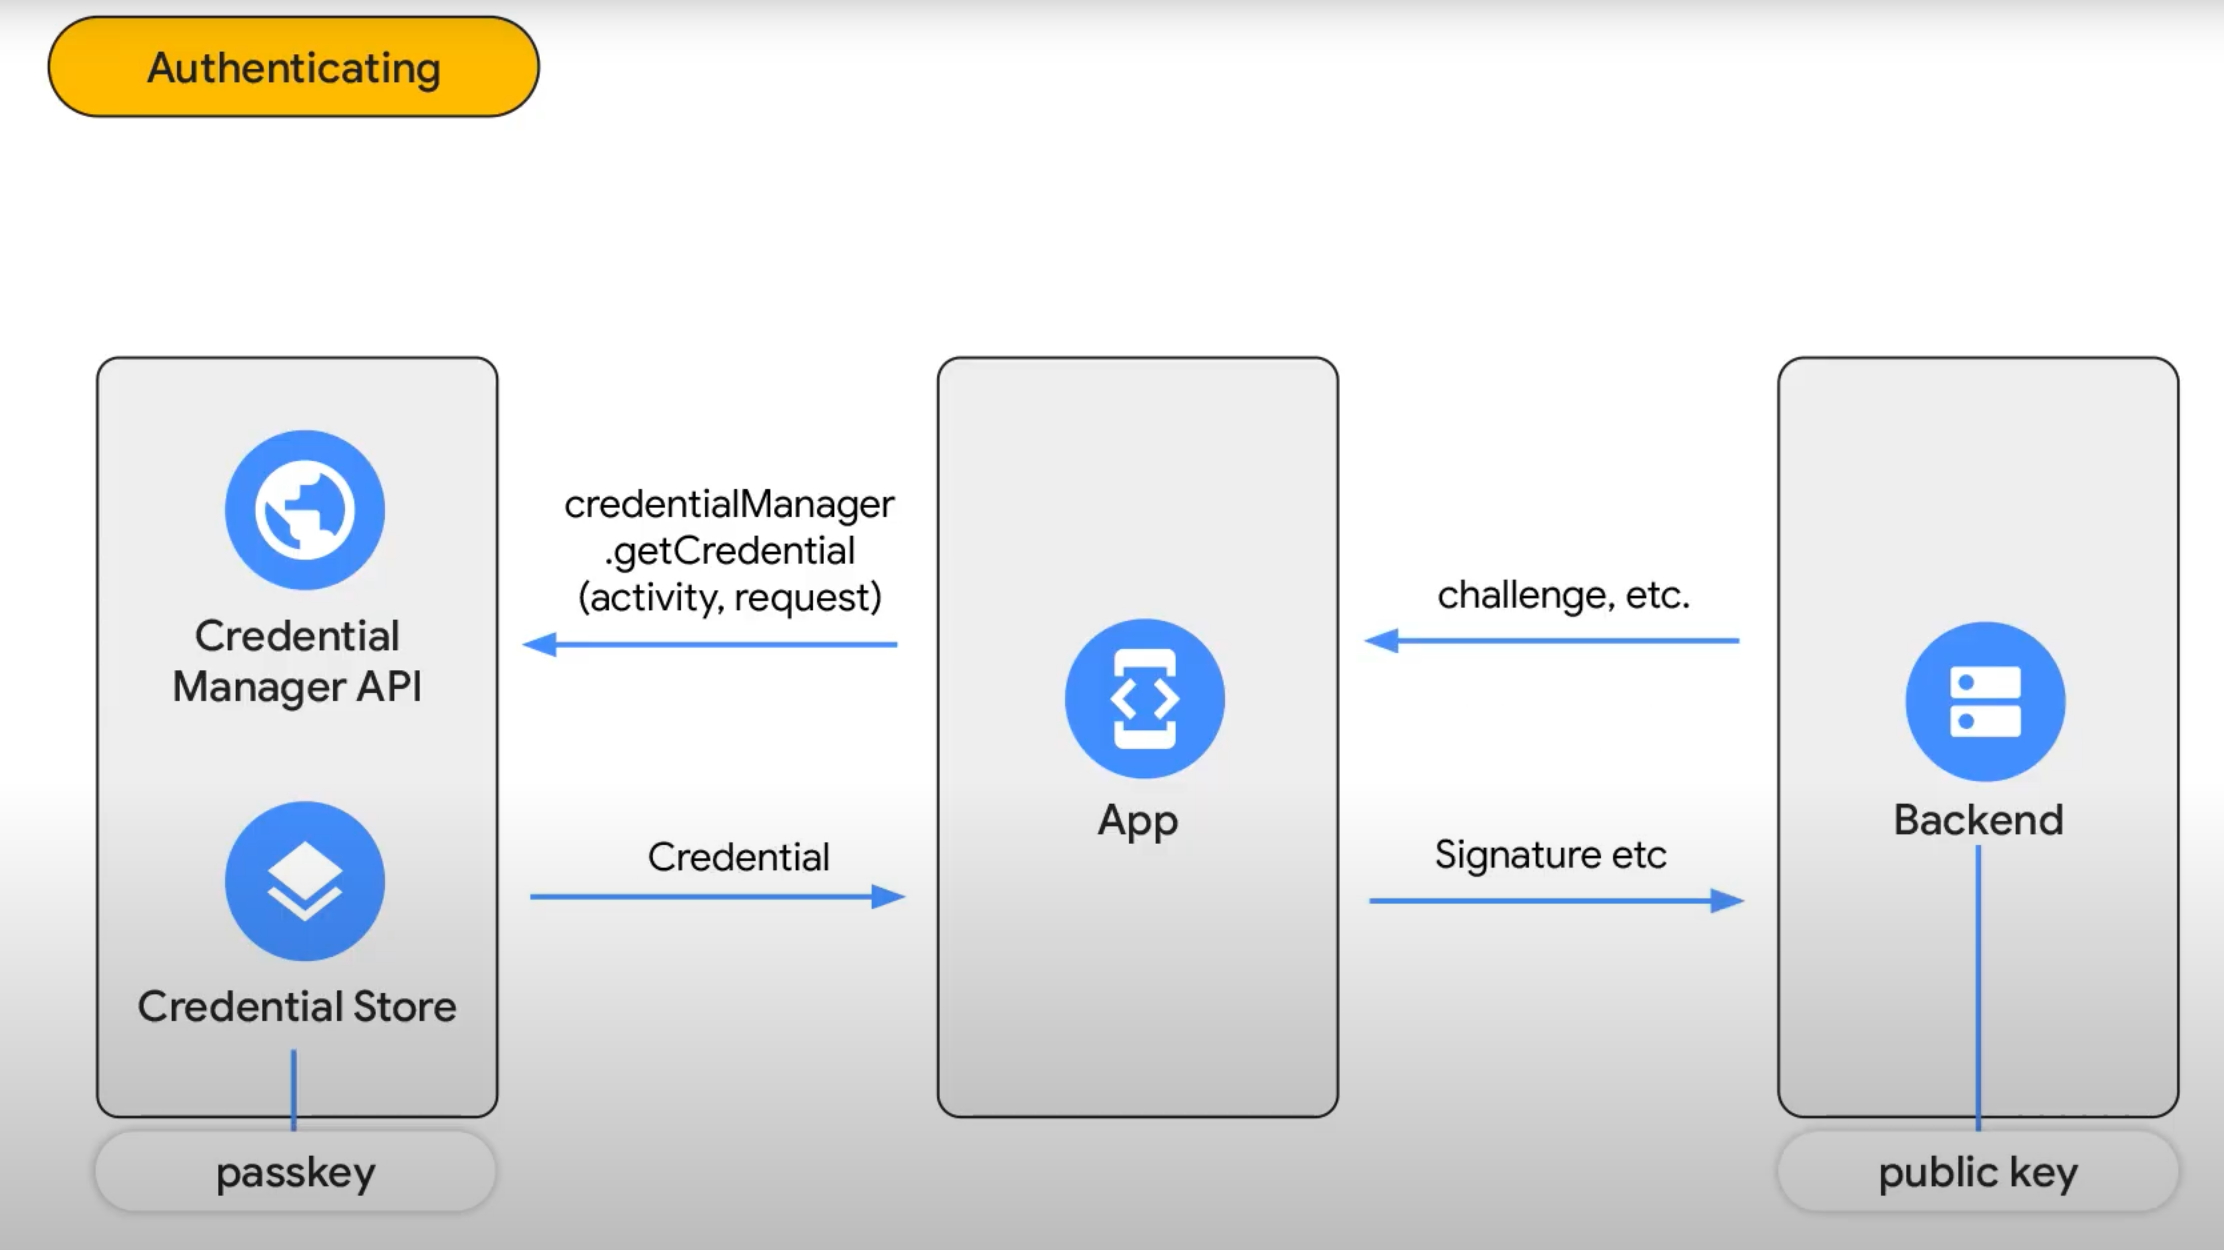
Once all those steps are complete your application can now invoke the credential manager API to prompt the user for biometric verification. Once the verification is provided the app can retrieve the credential from the device credential storage and transmit the signature to your application’s backend to verify against the public key stored there. If verification is successful your backend can then confidently issue a JWT (Javascript Web Token) authenticating the user and authorizing them to perform any actions granted to that particular user.
I learned a lot in the process of building this particular feature out for Dexcom and I hope that by reading this article you vicariously learned a bit about passkeys as well!
Photo by Julia Taubitz on Unsplash
Comments